Showing posts with label protein. Show all posts

Thursday, October 25, 2012

Gluten-Free Mung Bean Pasta!

We've been on the hunt recently for something delicious and sans gluten to cook up for a gluten-free friend of ours. We really wanted to have a little dinner party and make something new and interesting that she could partake in. There were a few options we came up with but after recently sampling the gluten-free Mung Bean pasta made by Explore Asia we knew exactly what we were going to make!

This stuff is so unique and scrumptious! Made of totally organic green mung beans it is not only naturally gluten-free but also high in protein, low in carbs, and 100% vegan. 
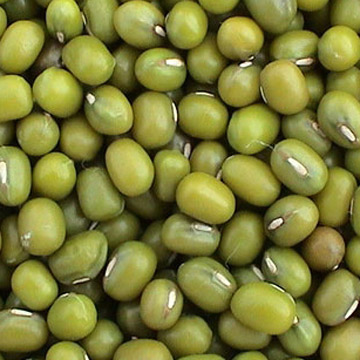
So what are mung beans? They are small green legumes which are seeds from the pods of plants. You might know them better as bean spouts in their sprouted form. That's right! Those white sprouts that are served with Pho and other dishes- they're mung beans sprouts!
Like many other legumes, the mung bean can be eaten raw when sprouted, or else eaten cooked with the skin on or off, but unlike many other beans, the mung bean is quite easy on the digestive tract and doesn’t usually cause a gassy reaction.

At first we just stared at the bag and weren't quite sure how we were going to prepare them. Should we treat them like spaghetti noodles and cover them in lentil meatballs and red sauce? Should we follow the suggestion on the package and toss the cooked noodles in vegan butter? Hrm...

After a little thought and some research we decided this was a job for our signature coconut milk alfredo sauce! The main ingredients: coconut milk, nutritional yeast, and corn starch are all gluten-free! Yay!

If you link to the blog post for the alfredo sauce recipe note that we didn't follow the directions exactly as we would for the kale alfredo. Instead we made the sauce in one small pan, sauteed the kale in another, and lightly steamed some broccoli separately. We then mixed them all together and got this as a result:
And man on man was it just as delicious as it looks! 

One can of coconut milk made enough sauce for about half the bag, which was about 2-3 servings. You could certainly stretch the bag and feed 6-7 people. Just add extra veggies! 

The texture is a little different than a typical pasta. Thin and flat. Less starchy than flour pasta for sure, possibly slightly al dente, but oh so good!

Next time we may even consider adding this pasta to a stir-fry and going the soy sauce or other asian sauce route. We may even top it with some Gardein Mandarin Orange Crispy Chik'n.

Either way, we highly suggest giving it a try and doing some experimenting of your own. Especially if you are gluten-free or have gluten-free friends! 

With peace, love, and compassion-
The Two Vegan Ladies

Tuesday, September 18, 2012

Creamy Avocado Collard Green Wraps


Yesterday at the produce stand we came across some amazing looking collard greens and just had to pick some up.

The leaves were so big we knew we could really do something great with them. So we ran home and just let this recipe create itself.

The result was pretty amazing. Packed with nutrients and delicious! This combination of flavors really works!

It was hard to come up with a name for them because there are so many different elements. A friend who shared dinner with us last night suggested "Medley Wraps" because really that's what they are. A medley of vegetable and tastes. But for the sake of quick explanation we went with "Creamy Avocado Collard Green Wraps" for the blog title. :-) But you can call them Medley Wraps if you want, that's totally okay with us!

You will need:
Collard Greens (a bunch with the largest leaves you can find)
1/2 small head of green cabbage
1-2 large carrots
2 yellow onions
1-2 green onions
1/2 block tofu
1 medium avocado
1/4 can coconut milk
4 cloves of garlic
1 TBS soy sauce
salt
pepper
paprika
garlic powder
turmeric


To prepare:

1. Separate the collard green leaves and cut off the long stems. Wash the greens throughly then fill a large pot with water and let it come to a boil. Once pot is boiling, turn off heat, set pot to side and place leaves into water. Cover and let sit.


2. Cut your block of firm tofu in half and then into small cubes. Boil a small pot of water, remove from heat, add tofu, and let sit for a few minutes while you prepare your veggies.


3. Wash other vegetables. Chop cabbage into slices and make carrots into thin sticks. We left our onions pretty long as well and just chopped our green onions all the way down the stem (you want the green and the white parts).

4. Once all veggies are chopped, heat a wok or skillet to medium heat and add a little olive oil or non-stick spray. Throw in veggies and lightly sauté with a tablespoon of soy sauce and a dash of salt, pepper, and garlic powder. (Try not to overcook. They'll continue to cook in the oven and you don't want them to get too soft.) 


5. Drain tofu and add to vegetables in wok/skillet. Give veggies/tofu a small toss to mix.

6. Carefully remove green leaves from pot and set on dry surface. You may want to pat dry with a paper towel. 

7. Add a few large spoonfuls of sauteed veggies on top of leaves and then wrap by folding up from the stem, followed by folding in the sides to create a seal, then rolling up till end is reached. 


8. After all the wraps are sealed, preheat oven to 350ºF and coat a baking dish with non-stick cooking spray, then place wraps inside.


9. Chop four cloves of garlic and in a small dish mix with a small amount of olive oil, salt, pepper, and turmeric then place on top of wraps and stick in oven for 25 minutes.


10. While wraps are cooking prepare topping. In a food processor combine 1 medium avocado with 1/4 can coconut milk and a few pinches of salt, pepper, garlic powder, and paprika. Blend until smooth and creamy.

11. After 25 minutes, take out wraps and set on plate. We served ours on a bed of balsamic sauteed chickpeas (sauté chick peas in spices and balsamic vinegar until soft). Set the roasted garlic to the side, top wraps with a thick strip of avocado mixture and then garnish with roasted garlic and paprika.


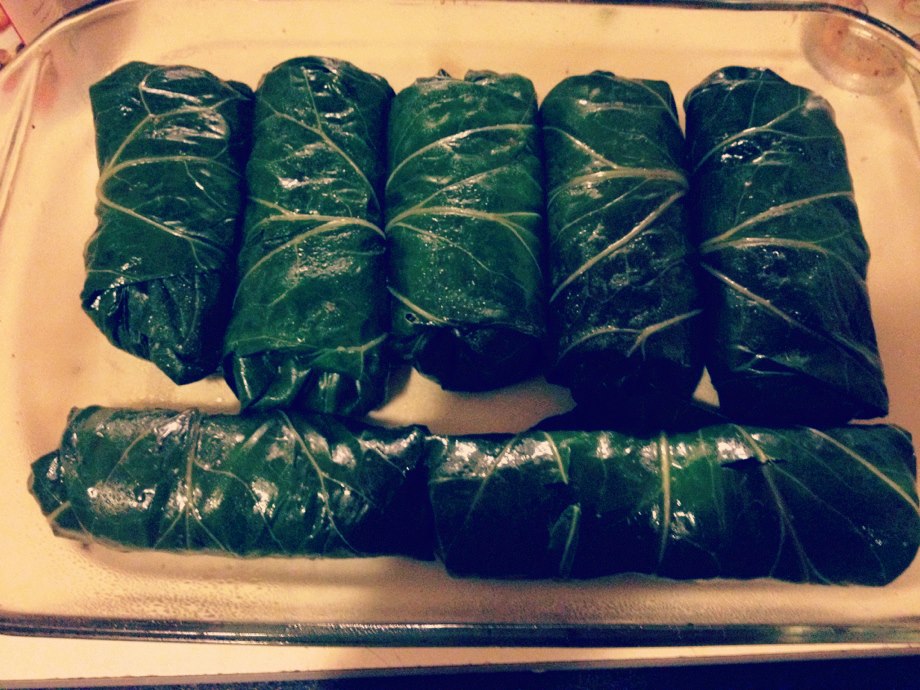
Once cut into the filling will look something like this and will taste delicious! 

Enjoy! 

(And don't worry our honeymoon review of The Florida Keys is coming soon!)

With peace, love, and compassion-
The Two Vegan Ladies

Monday, May 14, 2012

What the Sprout?


So... sprouts! 


What are they? Why should you take the time to make them and why should you eat them? 


Well...
Sprouts are the living part that comes out of a bean/seed when it is soaked in water. 


They contain oxygen, healthy fats, fiber, and protein. They're also low in calories and high in vitamins B and C! 


You can buy some sprouted and living foods in grocery stores, but it's so easy, fun, and rewarding to sprout them yourself at home!


So let's get started with some lentils! This process will take about 3-4 days.


What you'll need:


A glass mason jar
Mesh fabric  
A rubber band (hair ties work too!)
Water
Green/brown lentils


This sort of feels like a science project already, doesn't it? We told you it was fun! 


Step 1:


1. Take the jar and fill it about 1/4 of the way with your lentils.


2. Fill your jar with 2-3 times as much water as you have of your lentils.


(Note: we suggest using filtered water for this step, like from a Brita pitcher, because your lentils are going to soak in it overnight. If you plan to eat them raw you're not going to want all the added stuff in tap water to end up in your sprouts.)


3. Put your mesh fabric over your jar and pull it taught, secure it with your rubber band.


                     4. Set in a shady/room temperature location.

                                                        5. Wait 8-12 hours to move on to step 2 instructions. 


Step 2: (8-12 hours later)
Look closely, you may have some small sprouts already!


1. Make sure 8-12 hours have elapsed. Don't wait more than 12 hours with them soaking or they could start to turn over saturated and icky! 


2. Drain the soaking water from the jar through your mesh lid. Get it all out.


3. Fill again with water and give a good swirl.


4. Drain all water from the jar.


5. Repeat the rinse/drain process until your water runs clear.


6. Make sure all water has drained from your jar and then set back in shady room temperature location. 


Step 3: (8-12 hours later)
Your sprouts should be pretty easy to see now! 


Repeat all steps from Step 2. Rinse, rinse, rinse and make sure all the water is drained from the jar. 


Step 4: (8-12 hours later)
Your sprouts may be just about ready to go. 

If jar is full and the sprouts have a little green on the end, then go no further. If not, continue the rinse/drain process until your sprouts look ready.

Sometimes it takes a little longer, not to worry! Just keep rinsing and draining. 


When they are finished give them a last rinse/drain and then either take off your mesh cover and add a real jar lid or put them into a tupperware container and place in the refrigerator. 


You can do so much with these little guys! And it's a good thing, because you're going to have a lot of them! We suggest eating them raw on salads and sandwiches or cooking them in a stir-fry. 


Our favorite sprout dish:
A hummus, tomato paste, lettuce, tomato, and sprout sandwich!
Yummy!


Enjoy your new sprouty friends and eat them often, for they are delicious and good for you!


With peace, love, and compassion-
The Two Vegan Ladies
Related Posts Plugin for WordPress, Blogger...